| Subject: e-Z News, Volume 16 Customize Your View in CDS |
May 20, 2003 |
|
|
|
| Subject: e-Z News, Volume 16 Customize Your View in CDS |
May 20, 2003 |
|
|
|
|
|
|
|
|
|
|
The Client Data System – Your Way! In Volume 10 of e-Z News, we showed you how to customize field choices in CDS. Starting with this issue, we’ll show you how to customize a Summary view to meet your research, reporting, and marketing needs. Table for One – With a View Please. We’ll begin with some quick definitions that will be important later in the tutorial. Table Spreadsheet |
|
|
|
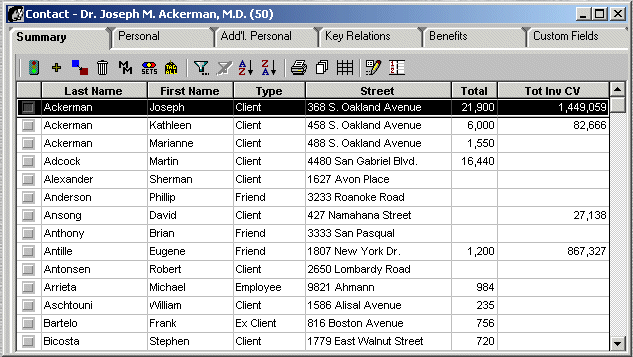
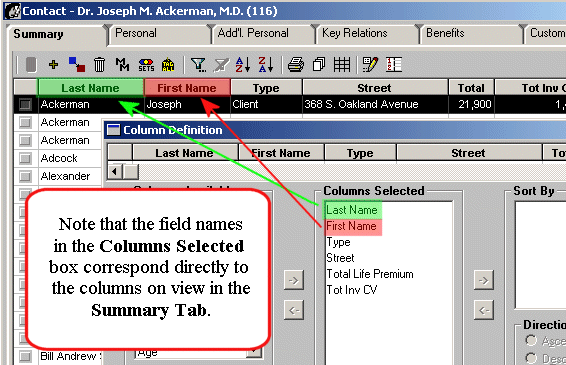
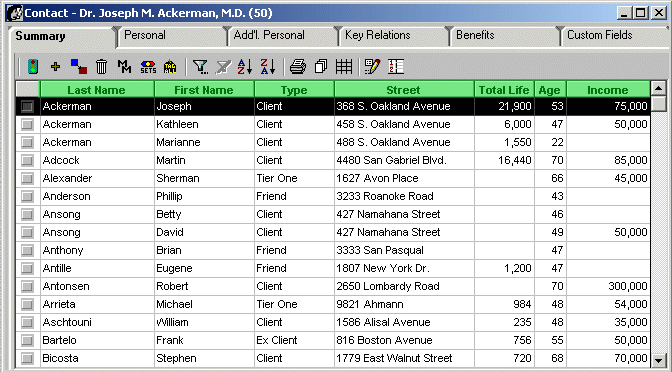
The Summary Tab view of the Contact Record in CDS. |
|
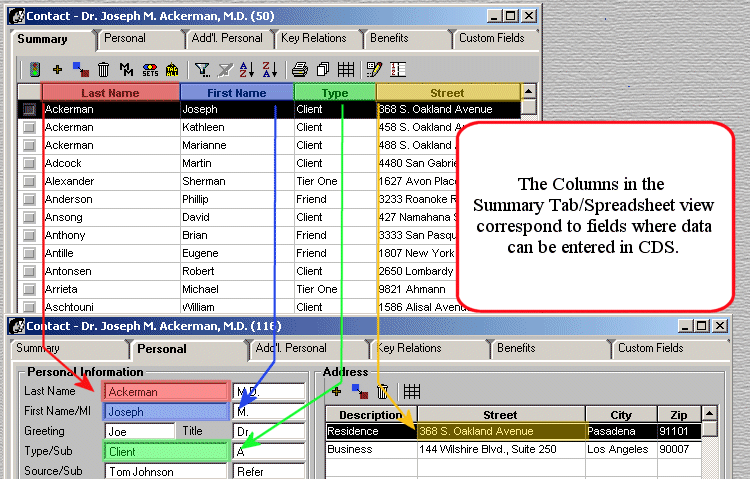
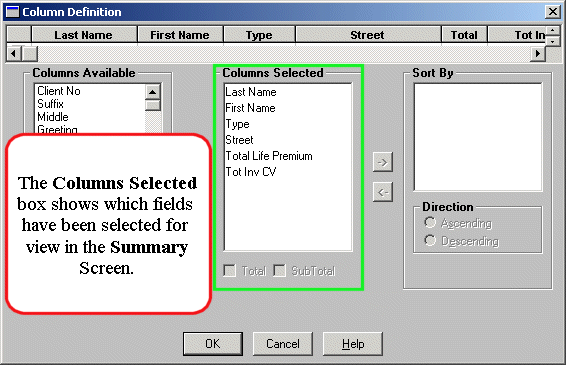
Column Any one Column in a spreadsheet/Summary view of CDS corresponds directly to field where data can be input in CDS. For instance the Last name field in the Contact record is referred to as the Last name column when it is included in a spreadsheet. |
|
|
|
|
|
Virtually
every Summary screen you see in CDS can be quickly and easily
customized to display just the data you want to see––in the order in which
you’d like to see it! If you use CDS in a network environment, you can make
changes to your Summary views without affecting the way other users on
the network view the same data.
Marketing
Made E-Z Let’s say you are in the process of deciding how to market a new Long Term Care product. Part of the decision- making process will involve determining how many prospects for the new product are currently in your client base. The new LTC product is ideal for clients who already carry some form of life insurance, are between the ages of 35 and 60, and have an annual income between $35,000 and $80,000. You log on to CDS and pull up
your Contact Summary screen. You can see the Total Life Premium for each
client but you can’t see his or her age or income. The good news is CDS allows
you to pull that information into your spreadsheet ‘on the fly’ without
having to generate a complex report. |
|
|
|
|
|
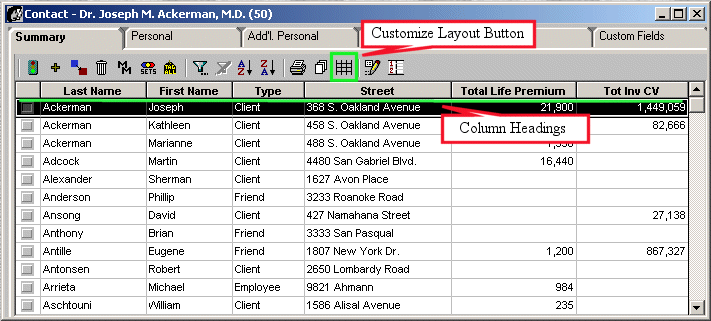
The columns already selected in our example view are Last Name, First Name, Type, Street, Total Life Premium and Total Inv CV (Total Investment Cash Value). In order to get the view you will need to plan your marketing strategy for the new LTC product, we will need to bring in the Age and Income columns. In addition, we will take the Total Inv CV column out of the Summary view in order to focus only on the information needed at the moment. Don’t worry, you can bring the Total Inv CV column back any time you like. Now,
Click on the Customize Layout Button and the Column Definition window
will display. |
|
|
|
|
|
|
|
|
|
|
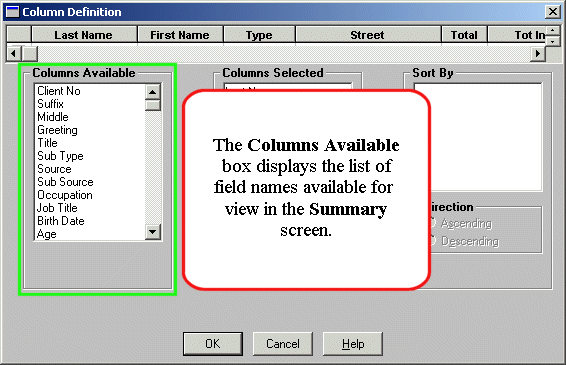
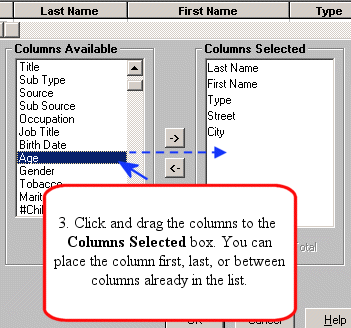
| Now we will change the columns included in the Summary view by moving columns out of the Columns Available box (these are all the fields available in the Contact table) and into the Columns Selected box (these are the fields that will display in the summary screen) in the Column Definition window. | |
|
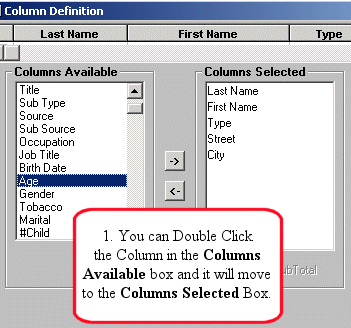
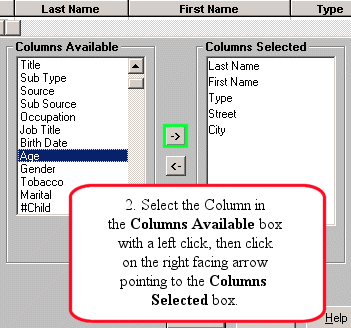
There
are Three ways to move a column from the Columns Available box |
|
|
|
|
|
OR |
|
|
|
|
|
OR |
|
|
|
|
|
NOTE:
Once you have the columns |
|
|
Next, we will repeat the
process to move the Income column to the Columns Selected box.
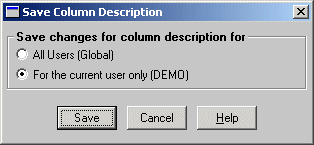
Now you can use one of the same methods in reverse to move the Total Inv CV column out of the Columns Selected box and back into the Columns Available box. You can double click the Total Inv CV column in the Columns Selected box, select it with a single click and click the left facing arrow, or drag and drop it back into the Columns Available box. Once you have the columns selected you want to see in your Summary view, click on the OK button at the bottom of the Column Definition window. A Save Column Description window will open giving you the option to save the column choices globally (for every user on your system) or for the current user only (you). |
|
|
|
|
|
Select For the current user only (your user name will appear in the parenthesis as opposed to DEMO as in our example). Now your Summary view has the columns required for you to mine your database for the new LTC product. |
|
|
|
|
| If you feel some of the columns are too close together or too far apart to view the data easily, you can resize the columns to suit your needs. | |
| To resize your columns, move the cursor to the small black vertical line that separates the column headings. When your cursor is directly over the line, it will change from an arrow to two small black lines with arrows on either side. This is the re-sizing cursor. When you see the re-sizing cursor, hold the left mouse button down and drag the line separating your columns to the right or left until you have the view that you want. Once you are satisfied with the view, release the left mouse button and your column has been resized. Try it! |
|
|
In
our next issue, we will show you how to use the filter and sort tools to
target the clients who already carry life insurance, are between the ages of
35 and 60, and who have an annual income between $35,000 and $80,000. |
|
| In the next E-Z News: Filter and Sort. | |